


_ _ _ _ _ _ _ _ _ _ _ _ _ _ _ _ _ _ _ _ _ _ _ _ _ _ _ _ _ _ _ _ _ _ _ _ _ _ _ _ _ _ _ _ _ _ _ _ _ _ _ _ _
Formerly ... CraftyFunParties.com

ATTENTION IPHONE USERS (And some others)
All the files available for download on this site are in ZIP Format. (Clipart, AI Generated Pictures, SVGs and PDFs)
Your device will need to recognize ZIP files, for some devices it may require you download a ZIP APP.

Pumpkins
Pumpkin Crafts, Ideas for Carving and Painting Pumpkins, Clipart, AI Generated Pictures, SVGs and MORE

All Clipart on this page
is "Stealable" (FREE)
Click on the pic you want to Download
Follow Us on FB to get updated on what's been added.
Quick Links For This Page
Make Your Own Pumpkin - Crafts - FREE AI Generated Images - Floral - The Great Pumpkin - Pumpkin Fake Bakes - Cricut Crafts - Wooden Pumpkin Decorating Contest - Pumpkin Carving
Other Halloween Pages

Main Page

Tricks - Fake Bakes
Looks good enough to eat but I wouldn't recommend it.
Treats - Things you can actually Eat
AND Ideas to collect and store your goodies
Make Your Own Pumpkin
DT Paper Clip Holder Pumpkin
This one is quick, easy and really cute
-
Paint 2 Dollar Tree Paper Clip Holders orange
-
Tie then together with twine or wire, so they will open
-
Add accents, (stem, leaves, twine)
-
Add a Electric Candle (You can accent too)


Burlap Light Up Pumpkin
This was a Dollar Tree find.
Originally is was a somewhat tacky light up foam pumpkin covered in orange glitter. I painted it with a burlap colored paint so the orange would not show through AND it sealed the glitter so it wasn't EVERYWHERE. Then I simply glued burlap to it and added some twine, green burlap leaves and floral tape covered wire.


Twine/Jute Pumpkin

Fabric Pumpkins

Slice a small wedge from a 4"-5" slice of a pool noodle

Wrap with Jute, Twine, Rope. Keep in mind the sturdier your twine the better it will hold up

This twine was pretty thick so I wrap it around 25 times. Place a wire through the center of the pool noodle

Bring the wire up through the slice you cut and tie off the twine as tight as you can

Slide the Twine off the pool noodle

Repeat 4 more times for a total of 5

Use a glue gun to glue the 5 pieces together to form a circle.

Glue the circle closed

Add a stick/cork something for a stem. I used burlap for leaves but silk flower leaves would work also
Click on 1st picture for
Step by Step Instructions

For this one I just sewed a running stitch around a circular piece of fabric. Placed polyfill on top of it, pulled it tight and tied it off.

Glass Jar Pumpkin
Simply paint a glass jar or mason jar orange, (I use spaghetti sauce jars a lot) paint the lid green and add some decorations

Wooden Cube Pumpkin

DollarTree Pallet Pumpkin
Crafts

Market Fresh Pumpkins
The gnome is a sock gnome. (See the Sock Gnome Page for instructions and Options)
Crate and pumpkins are from Dollar Tree and the sign is permanent vinyl cut on the Cricut. (You could use a paint pen)

Glass Pumpkin Candle Holders
Simply paint a glass wine glasses and decorate

Crown Royal Bottle Pumpkin

Pumpkin Gnome Wall Hanging
I combined 3 of The Dollar Tree's Plaques ... The Wooden Pumpkin (I painted) ... The Metal Gnome ... Pumpkin Hello Fall Shelf Sitter. Added some rafia and leaves.
DT Wall Hanging Felt Pumpkin Makeover


-
Glue some felt/material to the edge of the back of your pumpkin. Leave the center so you can stuff it with polyfill. Leave the bottom open so you can add the legs.
-
Glue dowel to the inside of your pumpkins where you want the legs
-
I rolled and glued some purple felt into a tube. I made the tubes bigger then the dowel so I could scrunch them up. Put them around the dowel and glue to the inside of the pumpkin.
-
Stuff the pumpkin lightly and glue closed.
-
The shoes are the Gnome Boots I made bigger. The pattern and directions can be found on the Sock Gnome Page. (Your going to need to enlarge them.)
-
Insert and glue the legs into the boots
-
Add ribbons and embellishments and your done.

The Dollar Tree stacked pumpkins are real popular, to the point you can't find them. So Improvise. Most DT's have a good supply of other pumpkins, that with a dowel and some glue can be stacked.

Dollar Tree Light Up Mesh Pumpkin Candle Holder
You can interchange the various "parts" of crafts to create something new. The Twisted Ruffled hat is from the Sock Gnome Page. (I use it for a lot of crafts.)


Paint a DT wine glass with black chalk paint and Flat Mod Podge. I added material inside the glass to hold the candle. Add Bow

I used a glass bubble bowl and the tubular rope from DT (Jute would work too) and wrapped it over the glass. I only secured it at the top under the stem and bottom of the bowl. If you add glue along the length of the rope, the glue will show from the inside of the glass. If you want it more secure run another piece of rope around the brim of the glass
Glass Pumpkin Candle Holder
Paint a DT wine glass with black chalk paint and Flat Mod Podge.
Pumpkin Gnome
Use a pumpkin as the base of your gnome.

The Carver
Jack O Lantern Gnome

Dollar Tree Glass Jack O Lantern
Add "Gnome Parts" to other things to reimagine them. Directions for the hat and boots can be found on The Sock Gnome Page
Add an electronic candle or use as a candy jar


Sometimes the crafts themselves decide what they want to be. I knew I wanted to use the pumpkin as a hat. Once I glued it on it reminded me of a crown. So I gave him a scepter and now he is The Pumpkin King.
FREE AI Generated Images
FREE AI Generated Images
Slideshows contain MORE then what is pictured here
Click on 1st pic here to start the slideshow. Each pic has a link with it so you can download which ever ones you want.


Country Farmhouse Images


Pumpkin Images
Click on 1st pic here to start the slideshow. Each pic has a link with it so you can download which ever ones you want.


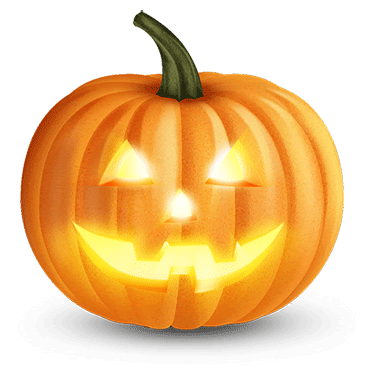
Jack O Lanterns
Click on 1st pic here to start the slideshow. Each pic has a link with it so you can download which ever ones you want.


Click on 1st pic here to start the slideshow. Each pic has a link with it so you can download which ever ones you want.

Pumpkin Carving
Floral

Add pumpkins to your floral arrangements to give them a different texture


Use a pumpkin as your vase.
This is a Dollar Tree styrofoam pumpkin. I painted it to tone down the orange. Add flowers at various depths to add dimension to your arrangement. The jute running through the arrangement also adds depth AND it was used to cover the seam in the pumpkin.

Add ribbon to your arrangements.
In this case it helps carry the plaid throughout the whole composition
The Great Pumpkin

Great Pumpkin Busted Canvas

You will need 2 canvases. One needs to be a stretched canvas the one that is stretched around a wooden frame. The second of the same size is flat.
FREE JPG Files
Click on pic to Download
Stretched Canvas FRONT
Main Image. I painted this.
Stretched Canvas BACK
Flaps Image. I painted this.
Flat Canvas FRONT
Peeking Image
* Make sure to put the image on the board where you want him to appear on your project. This one is centered but he doesn't have to be.
CUT The Stretched Canvas like a pizza where you want your image
GLUE The Flat Canvas to the back of the Stretched Canvas so the Image Peeks out
DECORATE For this one I just wrapped ribbon around the sides to cover where they are glued together and added a bow


There are MORE Great Pumpkin Pictures.
Click on 1st pic here to start the slideshow. Each pic has a link with it so you can download which ever ones you want.


FREE AI Generated Images

I seen on my FB feed an idea of taking a pumpkin and writing on it something that you are grateful or thankful for everyday from now til Halloween. Obviously the author of the post AND ME think the world would be a better place if we were thankful/grateful more then just on Thanksgiving. I kind of took that idea and ran with it in a crafty way. "It's The Great-Ful Pumpkin, Charlie Brown" Show gratitude even if you get ROCKS !!!
.jpg)
I started with a Dollar Tree foam pumpkin, painted it to tone down the color. (Why are they in your face orange ?)
Charlie Brown is a pill bottle I glued 1/2 a styrofoam sphere to the top, so when I place the Sheet (Felt) over him it would be rounded. I glue felt to the bottle and added Gnome Shoes (See The Sock Gnome Page) You don't need the shoes !! I then just glue white felt over him for the sheet and added some black felt dots
The sign is a DT chalkboard I wrote on with a paint pen. The rocks were from when I went Trick or Treating last year :D


It's the Great-Ful Pumpkin Charlie Brown
Pumpkin Fake Bakes


Pumpkin Pie Garland


How Did I Do This ?
This guide is a slideshow you can click through.There are more pics then what are seen. Click on First Pic to start.

Fake Bake Pumpkin Pie
See The Fake Bake Page For Instructions


Silicone Molds are a great, easy way to make fake candy, just fill them with Hot Glue, wait a few minutes and paint


Miniature Version.
You can use the same concept scaled downed for a miniature version. For the pie pan I cut down plastic Solo Cup and painted it silver/Gun Metal. Cut a circle of cardboard to fit inside. Wrap it in the orange felt (just like you do for the large ones.) Cut a piece of crust colored felt in a circle a little a little bigger then the orange circle and glue it to the bottom. Add some glue to the bottom of that layer and drop it in your pan. The crust automatically ruffles when you drop it in
The miniature version is perfect for Gnomes. It's light weight and won't weigh down the arms. Gnome Health Department might want to find some kind of hair net for the beard however. :D
Download Includes:
-
Pumpkin Box SVG File
-
Pumpkin Box Instructions PDF File
These cute Pumpkin Boxes are great party favors, Halloween decorations or for your special little Tricksters.
Cricut Pumpkin Boxes


Buffalo Plaid Wooden Pumpkin
The wooden pumpkin I found at Dollar Tree, I sanded off the glitter and painted it with white chalk paint.
The Buffalo Plaid Pumpkin is vinyl I cut on the Cricut. SVG available here. I added a bow and embellishishments

Click pic for FREE SVG
Cricut Pumpkins
Pumpkin SVG Files
FREE SVG Files
Click on the ones you want to Download


Wooden Pumpkin Decorating Contest

A fun idea for work, school, parties or groups, is a pumpkin decorating contest. Decorating small wooden pumpkins is easy, no matter what their age or craft level. AND a whole lot less messy then decorating real pumpkins. Small wooden pumpkins can be found at Dollar Tree or any craft store. You can provide paint and embellishments or let the participants take them home to decorate and bring them back. Vote for the favorites.


Add Paint

Add a Face


Add a Embellishments
Add Glitz
Make It Personal


Add Accessories
Make It FUN !!!
Carving
Soak your pumpkins in bleach after carving to prevent them from molding and they will last longer. 1 teaspoon bleach for every 1 gallon of water into a larger container and stick your pumpkin inside. Let them soak for 20-30 minutes and pull out and allow to air dry.
After it's dry spraying the cut surfaces with hairspray can also slow down the decaying process.

Basic Pumpkin Carving
Pumpkins Carved Clean Through
Cutting holes all the way through a pumpkin's skin.
Carved Face


Add some narrow cuts all the way through and your pumpkin can be more Creepy


Fiery Pumpkin
Click on Patterns for Free PDF Files
Transferring an Image on to a Pumpkin


Pin your image onto the pumpkin. Cut slits in the pattern paper to allow it to curve with the shape of the pumpkin. Place the pins on the part of the pattern you will be cutting out.


Use a pumpkin poking tool, nail, toothpick. etc. to poke small holes through the paper, tracing the lines of the pattern.
Remove the image when finished and dust some baby powder or cornstarch over the area so the holes will be more apparent.


Wipe Off Excess and your now ready to start carving
Flaming Pumpkin

Turn Up The Heat


Place a roll of toilet paper inside your pumpkin. . Soak it with kerosene, throw in a match and STAND BACK !!!!
Adult Assistance Required but the Kids Love this. We set it on a concrete driveway up away from the trick or treaters and placed a piece of plywood underneath it so it wouldn't singe the concrete. Burns for a couple of hours.

More Pumpkins Carved Clean Through
Using the same basic techniques your possibilities are endless


Hanging Bat Pumpkin
Keep in mind when drawing or picking out your pattern that you need enough spots attached to the pumpkin so it's still secure. In the case of this bat. The wings and the ears are not carved all the way around, otherwise your just going to have a circle when you are done


Cherished Teddies
Teddy Bear Pumpkin

Tinkerbell Pumpkin

Tinkerbell Silhouette
is a JPG file
Fairy dust holes were done with a drill


Vampire Mickey Mouse Pumpkin


Pumpkins Without
CARVING

Painted Pumpkins
Partially Carved
Pumpkins

Gooey Pumpkin Monster
I cut the lid off the pumpkin and added felt facial features. I glued them to pipe cleaners and poked them in the "goo."

Milk Jug Pumpkin
This one is super easy. Simply cut a mouth out of a mug jug, paint it orange and add eyes and teeth. The stem is a toilet paper roll with some green pipe cleaners and a couple of felt leaves
Carving Without
A Pumpkin
Pumpkin Layering
Rather than cutting holes all the way through a pumpkin's skin, some people remove layers of the skin to create designs. The deeper you carve the lighter the effect. Just take off the "skin" and it will be darker in those areas.

HINT: When possible leave the pieces that are cut clean through in place until after you've done your layering. This will give the pumpkin more security while you are layering.


Cat Pumpkin

Lantern Pumpkins


With Practice and PATIENCE you can transfer and carve any image
Light Em Up
Waterproof LED Light
I found this at Five Below. So many uses, safely light up your pumpkins, no flames and brighter then your electronic candles.

Transforms a Simple Milk Jug into a
Ghost .... Pumpkin .... Monster


OR

AND it is totally SUBMERSIBLE.
Even after Halloween,
this is a crafter's, party planner's must have.
The potentials are endless
I found this at Dollar Tree. They are just plastic pieces you poke in to the pumpkin