

_ _ _ _ _ _ _ _ _ _ _ _ _ _ _ _ _ _ _ _ _ _ _ _ _ _ _ _ _ _ _ _ _ _ _ _ _ _ _ _ _ _ _ _ _ _ _ _ _ _ _ _ _
Formerly ... CraftyFunParties.com

ATTENTION IPHONE USERS (And some others)
All the files available for download on this site are in ZIP Format. (Clipart, AI Generated Pictures, SVGs and PDFs)
Your device will need to recognize ZIP files, for some devices it may require you download a ZIP APP.

Standing Gnomes
Check Out All of Our Gnome Pages
Gnomes Main Page
Sock Gnomes Page
Standing Gnomes Page
Follow Us on FB to get updated on what's been added.
Ok you've got the sock gnomes down, it's time to "Step it Up".

This page will basically cover the body, legs and clothing. If you're looking for info on beards, hats, noses and arms, see our Sock Gnome Page. Most of those principles will apply for these gnomes too, I will point out where they differ.
Quick Links For This Page
Boots and Shoes - Standing Sock Gnomes - Bottle Gnomes - Pool Noodle Gnomes - Fabric Stiffened Gnomes - Themed Standing Gnomes
BEFORE YOU BEGIN YOU ARE GOING TO NEED BOOTS OR SHOES
The Gnome Tutorials don't include instructions for boots or shoes. They will show you how to attach them but not how to make them. There are several options here to make them or you can buy them premade. You can find boots at Walmart, Dollar Tree etc especially at Christmas time in the ornament sections ... Standing Gnomes need something to stand on.
Boots and Shoes


These are available at most DT's.
You get 6 for $1.25
BOOTS FROM DOLLAR TREE BABY SHOWER BOOTIES

Add fur to your boots


CAN'T FIND DOLLAR TREE BABY SHOWER BOOTIES
MAKE YOUR OWN !!!
Card Stock or Poster Board and a Printer and you can make your own. Each shoe is only 3 pieces.

These work out well for the Sock Gnomes you are gluing the boots directly to the socks. (See Below) They are a little bigger at the opening, not much but enough where you can get a larger piece of styrofoam in them. More styrofoam means more contact, more contact means more stability


The Instructions cover how to put them together so it's the same for both. Make sure you download both the pattern AND the Instructions


Dollar Tree Faux Leather Purses work well for covering your boots. Inexpensive and cute. I even cut apart the grommets and used them as buttons
These are the ones I use most often.
How Did I Do This ?
This guide is a slideshow you can click through.There are more pics then what are seen. Click on First Pic to start.
How Did I Do This ?
This guide is a slideshow you can click through.There are more pics then what are seen. Click on First Pic to start.

SHOES
Love these
Small Tennis Shoes
Not sure why they market them as bird shoes ???? I got 24 (12 Pairs) for $25.
12 (6 Pairs) is $19. Much better deal if you can use more. Cute for other craft projects too.
Amazon Paid Link

MAKE YOUR OWN TENNIS SHOES


These are both cute and easy. There is both a Printable PDF Pattern for those who don't have a Cricut and a SVG File for those who do.
The Instructions cover how to put them together so it's the same for both.
(Cricut users if you need help to import the file into Design Space See Our Crafty Fun Cuts Page for Help)
We used Craft Foam for these and No Grommets
We used faux leather for these and made cute work shoes

Whether you use the SVG file for Cricut OR the PDF File Printable Pattern, You need the instruction file too.
Ok, You've got your footwear. Now What?
There are 2 types of Standing Gnomes. WITHOUT LEGS and WITH LEGS.
Standing Gnomes without legs can be made with almost any type of body. The standing gnome WITH LEGS requires a base that you can insert a dowel into. Usually styrofoam, pool noodles etc. Yep poking a dowel into a sock filled with rice and stuffing is not going to be very secure and it's probably gonna make a mess :D
Standing Gnomes WITHOUT LEGS
Sock Gnomes


To add boots to a SOCK GNOME. Glue a piece of Styrofoam into your boot. Make sure the styrofoam and the the top part of the boot are the same height. This is going to give the boot more contact to the body of your gnome. The styrofoam needs to be to the top but it does not need to be packed from side to side. Leave some width to ADD MORE RICE OR SOMETHING FOR WEIGHT (ball bearings, washers) into the boot around the styrofoam. The MORE WEIGHT you can add the better the gnome will stand. Add glue around the top edge of the boot itself and on the piece of styrofoam covering the entire top of the boot a.) so rice or weights don't move b.) to add more weight. I have even shot glue into the boot for extra weight. Gnomes are going to be top heavy THE MORE WEIGHT YOU CAN ADD TO THE SHOES THE BETTER !!!!
*Boots attach more securely to a sock that is filled tightly with little stretch in it !!!
This is especially important when attaching boots for a standing gnome. You are only securing the boot to the outside of the sock. If the stuff inside can move around, it will change the shape of your gnome, so he may be unstable and fall over. So you want that sock to be as solid/stiff as possible.
Attaching the boots to the bottom of a Sock Gnome does take a little more finesse so he will actually stand. I usually stand my gnome on top of the boots BEFORE I add the glue. Once I get him positioned so he stands I remove the gnome and add the glue to one boot. Place the gnome back down securing that boot but still sitting on the other to make sure he still stands. After that one has set, I lift the gnome with the attached boot and add glue to the other. Set the gnome back down and secure that one so he still stands. With the polyfil and the rice there is still some play in the body of the gnome where you can get him to be balanced, I just find it easier to get him as balanced as possible before he is all glued together.


*Boots attach more securely to a sock that is filled tightly with little stretch in it

For extra stability glue the boots together after you have glued them to the body. Just a little glue on the inseams at the bottom will work

He didn't want to stand up !!! Whether you been making gnomes for a long time or just starting, you're going to get the ones that just don't want to stand up. Repositioning the shoes wasn't an option (I use LOTS of glue). My solution to counter balance him was to use the large present. He's cute but not what he was intended to be. In crafting sometimes it's about improvising.
Bottle Gnomes
AS WITH THE SOCK STANDING GNOMES YOU WANT TO FILL YOUR BOOTS/SHOES WITH AS MUCH WEIGHT AS POSSIBLE (See Above)

I use a lot of the WIDER prescription bottles for my gnomes. You want to make sure it is one of the wider ones so the bottom is big enough to attach a boots.


How Did I Do This ?
This guide is a slideshow you can click through.There are more pics then what are seen. Click on First Pic to start.


Amazon Paid Link
Messy Bun Gnome
This is a pill bottle gnome, with faux fur pom poms for hair. I used felt for the material. It's inexpensive and easy to work with. No need for seams. This tutorial does not include instructions for arms. I will include them in any upcoming tutorials, in the meantime you can find it on the Sock Gnome Page.
How Did I Do This ?
This guide is a slideshow you can click through.There are more pics then what are seen. Click on First Pic to start.
Any type of cylinder shaped bottle/container will work. This helps determine the size of your gnome. Yep use up the trash.


Coffee Creamer Gnome
How Did I Do This ?
This guide is a slideshow you can click through.There are more pics then what are seen. Click on First Pic to start.
Standing Gnomes WITH LEGS
The standing gnome WITH LEGS requires a base that you can insert dowels. Usually styrofoam, pool noodles etc.
Pool Noodle Gnomes
Do Not Fill All Of Your Boot/Shoe With Styrofoam For Gnomes With Legs. (As you do with Gnomes Without Legs.) You need room to insert the legs.


Pool Noodle Gnome
with DT Hair Roller Legs
and Coat
Same gnome with different hat and accents
How Did I Do This ?
This guide is a slideshow you can click through.There are more pics then what are seen. Click on First Pic to start.

Female Gnomes


Pool Noodle Gnome
with DT Hair Roller Legs
and Coat
How Did I Do This ?
This guide is a slideshow you can click through.There are more pics then what are seen. Click on First Pic to start.
Fabric Stiffened Gnomes
Stiffening the fabric lets you strategically put in the wrinkles where you want them. Although great for all materials I especially like it for felt and flannel. Felt is very easy to work with, it doesn't unravel, you don't need to make a seam and it's inexpensive. However felt has a tendency to look like a kids craft. Stiffening the felt gives it a more finished look.

Dilute Mod Podge with water. I don't have an exact recipe, however the more Mod Podge you use the stiffer the fabric will be. So it depends on your fabric, (heavier fabric will need more mod podge) and the look you want.


Dip your hat into the solution and squeeze out the excess. Yep this is messy, make sure you cover your work surface with plastic, foil etc. A cookie sheet with edges covered in something works well because the mixture will pool as it dries.
Place your fabric onto to styrofoam or a pool noodle and use your straight pins to to pin it into the shape you want. Add wrinkles or twist the end.As it dries this is going to pool at the bottom, keep turning the hat so the mixture doesn't build up in one spot. I usually remove a pin or two after a couple of hours to check that it is keeping its shape and to make sure its not sticking to the pool noodle.When it appears to be holding its shape remove pins and let dry thoroughly.
Glue solution can also be brushed on to clothes after they have been glued onto the body


Cover a 4-8 inch pool noodle with your fabric. Size depends on how big you want the BODY of the gnome to be.

Leave at least a 1/2 inch of the material beyond the pool noodle. This is going to be the bottom of the gnome. The excess will help hide where you are going to connect the legs.

For this demo I am making a girl gnome with a skirt, but this is the point where you add the bottom part of the gnomes clothes. Pants, skirt etc. I am using burlap for my skirt, so I gathered the burlap by pulling one of the threads at least 1/2 inch down

Keep gently pulling the thread until it forms a circle the size of the skirt you want. If your not using burlap you can run a running stitch to gather the material.

Glue the skirt unto the pool noodle body making sure your overhang is beneath the skirt

I added another strip of burlap to cover the gathering, you could use a ribbon. Because this is burlap and will unravel this is the point that I used the fabric stiffener

Legs. For the legs I used dowels inserted into DT Hair Rollers although you could just use the dowels. Leave some of the dowel exposed so you can insert them into the shoes and body.

Wrap the legs in your fabric and glue. These are going to be her tights/pants. Make the fabric section whatever length you want the legs. Leave some of the dowel at each end uncovered

Make 2 of these.


Note the pooling at the bottom. Make sure you flip it while it is drying to avoid build up

Glue solution is effective to keep burlap from unraveling

How Did I Do This ?
This guide is a slideshow you can click through.There are more pics then what are seen. Click on First Pic to start.
Themed Standing Gnomes
Redneck Gnomes

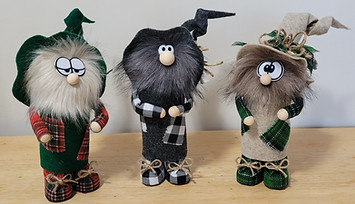
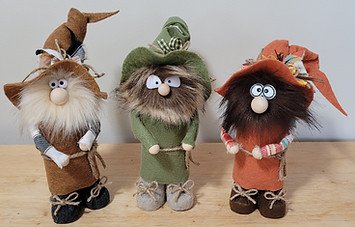
Sometimes my gnomes take on their personalities as I am making them. For these I wanted to use the new eyes I had ordered off Amazon. The eyes gave them a "cartoony" look. When I added hat Twisted Ruffled Hat they took on their redneck personalities, so I just went with it.
Amazon Paid Link

I found these eyes on Amazon. They are actually Doll Eyes I cut off the stem and just glued them on to the gnomes face. They come in 8 different styles and different sizes

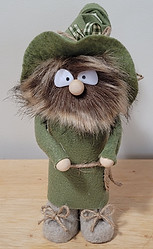
This guy reminds me of Toy Story's Mr Potato Head, Yea he packed his "Angry Eyes"

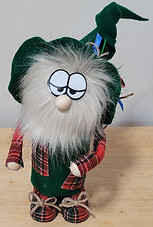
Dwarf formerly known as "Sleepy" has converted to a gnome
These are Pool Noodle Gnome. The head and beard are faux fur pom poms. Twisted ruffled hat and plaid material help to give them the back woods look

Baking Gnomes

Angel Food Cake Gnome

Wizard Gnome

Native American Gnomes


San Francisco 49ers Gnome
Patrick Mahomes Gnome
Kansas City Chiefs


